Lettori fissi

domenica 3 agosto 2014

Riciclo organizer

Eccomi qua  di ritorno , con un nuovo post tutto particolare ...
Qualche giorno fa mi ero messa a guardare gli organizer per mettere in ordine le carte scrap , e cosi mi sono decisa a crearne uno con modello realizzato da me :..
Per la realizzazione ho utilizzato del cartone ondulato ( quello degli scatoloni per imballaggi  va benissimo ) ,scotch di carta , acrilico nero , cartoncino colorato da 200 gr in su ; carta scrap e vari abbellimenti a piacere ... ecco quello  che è uscito fuori ...

Here I am back with a new post very special ...
A few days ago I had started to watch the organizer to sort the cards scraps, and so I decided to create one with a model made by me ..
For the construction I used corrugated cardboard (one of the cartons for packaging is fine), masking tape, black acrylic, colored cardboard up to 200 grams; scrap paper and various embellishments as you like ... that's what came out ...


Spero  che il mio post  vi sia piaciuto !! Ci vediamo al px !!

Hug Serena !!

martedì 15 luglio 2014

From the paper bag to the card---------Dal sacchetto di carta alla card

Ciao a tutti come state ?? 
Come è il tempo   da voi ????
 Ma siamo in estate  a luglio , o ad ottobre ??!!
Qui da me la  mattina un po di sole , il pomeriggio.... pioggia :( che noiaaaaaa !!


In questi giorni  mi è balenata in mente un idea strana .... da un sacchetto di carta .. un card !!!!! 

Infatti è nata la mia piccola card , ve la presento :
Ho preso il sacchetto di carta  , ho tagliato la parte dentata ed ho piegato a misura il sacchetto come mi interessava a me ...
 La copertina .. ho utilizzato un cartoncino grigio e uno bianco per fare lo sfondo ...
carta scrap verde , sopra ho riportato  un rettangolino con della carta scrap raffigurante delle farfalle , da parte ho incollato un fiore e sotto ho messo delle piccole punchate di fiori con sopra delle mezze perle .. 
La scritta lo fatta al pc ..


Al suo interno  , da una parte ho utilizzato un timbro di scritte e poi le ho embossate con la polverina bianca ed ho attaccato un fiore , riprendendo  i colori  delle carte che sono state utilizzate  per creare la card .. 
Dalla parte opposta ho attaccato un cartoncino bianco  e con della carta scrap ho creato una taschina nella quale ci si può inserire la lettera o il pensiero a cui vogliamo destinarla .. 


dietro ho fatto un rettangolino , nel quale  ho attaccato la scritta " fatto a mano "


Eccomi qua ... spero che il post sia di vostro gradimento , che vi sia piaciuto e che vi sia di ispirazione , per nuove creazioni !!

Baci Serena !!! :)

English

How is the weather by you?? 
  But we are in summer in July or October?! 
Here, a bit of me in the morning sun, afternoon rain ....: (what a bore! 
These days I floated in the mind a strange idea .... from a paper bag .. a card!! 
It was born my little card, I will present: 
I took the paper bag, I cut the notched side and I bent to fit the bag as I was interested in me ... 
  The cover .. I used a gray card and a white background to make it ... 
green scrap paper, I reported on a rectangle with a scrap of paper depicting butterflies by I glued a flower and I put it under punchate of small flowers with over half of pearls .. 
The writing made ​​it to the pc .. 
Inside, on the one hand, I used a stamp of written and then I-embossed with white powder and stuck a flower, taking the colors of the cards that have been used to create the card .. 
On the other side I attached a white cardboard and paper scraps I created a pocket in which you can enter the letter or the thought that we want to direct it ..
I made a rectangle behind, which I attached the word "handmade" 
Here I am ... I hope that the post is to your liking, you enjoyed it and that will be an inspiration for new creations! 

Serena Kisses! :)

mercoledì 2 luglio 2014

Review - Recensione

Ciao a tutti , oggi volevo fare un post dedicato ad una persona molto speciale , con la quale ho avuto  la possibilità di effettuare con lei uno SWAP indetto dal gruppo di fb Arte a tutto tondo....e quale modo migliore se non recensire i suoi lavori nel mio blog ?
L'artista , la grande artigiana  di cui vi parlerò è Giovanna De Bernardo ....
Allora ... Giovanna è una persona gentilissima e simpaticissima ,lei lavora la Porcellana di Capodimonte , sono molti anni che ha imparato a lavorarla  e devo dire  che è bravissima , realizza degli oggetti veramente preziosi e stupendi anche per la loro semplicità .Vi mostro i lavori che Giovanna  mi ha regalato sono meravigliosi:

Andate a visitarla nella sua pagina di facebook questo è il link :Le Creazioni di Giovanna Porcellane, li troverete tantissimi suoi lavori , uno più bello di un altro !!!!
Giusto che smemorata che sono !!! Giovanna  possiede anche un suo canale su you tube , questo è il link :Giovanna De Bernardo, andate e iscrivetevi !!!
ENGLISH

Hello everyone, today I wanted to do a post dedicated to a very special person with whom I have had the opportunity to perform with her group organized by a SWAP fb Art in the round .... and what better way if you do not review the his work in my blog? 
The artist, the great artisan of which I speak is Giovanna De Bernardo .... 
So ... Giovanna is a very nice and kind person, she works Capodimonte Porcelain, many years he has learned to work it and I must say it is very good, makes objects really precious and beautiful for their simplicity.'ll Show you the work that Joan gave me are wonderful: 


Go visit his facebook page this is the link: https://www.facebook.com/CreazionidiGiovanna/timelineyou'll find many of his works, one more beautiful than another!! 
Just that they are forgetful! Joan also has its own channel on you tube, this is the link: Giovanna De Bernardo, go and sign up!

lunedì 23 giugno 2014

envelopes that passion ... :) buste... che passione:)

eccomi qua .. propio vero , era tanto che non scrivevo nel blog , scusatemi ma aimè ho avuto dei problemi di salute che mi hanno costretto a tralasciare le mie passioni .... adesso sto meglio e quindi bando alle ciance , vi mostro dei lavori che realizzato  sono due mini album , il primo dei toni sull arancione e l altro  sui toni del rosa ...vi lascio alle foto :)

Per realizzare questi album ho utilizzato delle classiche buste da lettera , io ho utilizzato quelle che possedevo , ma per realizzare questi tipi di album potete usare qualsiasi busta che piu vi aggrada ,  come carte ho utilizzato delle carte della rayrer , che aimè non ricordo il nome , più ho abbinato le carte della collezione DCW Flower , almeno spero che si scrivi cosi ... :P


Per fare la copertina ho usato del cartoncino riciclato di scatole di biscotti , per la copertura ho scelto la carta di cotone dai toni arancioni ... 

Spero vi sia piaciuto ci vediamo al px post ::: 

 baci Serena 


ENGLISH

here I am .. propio true, it was so long since I wrote in my blog, sorry but alas I had some health problems that have forced me to miss my passions .... I'm better now and then without further ado, I show you the work that are made ​​of two mini albums, the first tone on orange and other shades of pink ... I leave you with photos :) 

To achieve these albums I used the classic envelopes, I used what I possessed, but to make these types of albums you can use any envelope that most suits you best, I've used the cards as cards of rayrer, which alas can not remember the name plus I paired the papers in the collection DCW Flower, at least I hope you write so ...: P 

To make the cover I used the recycled cardboard boxes of cookies, I chose to cover the cotton paper from orange tones ... 


I hope you enjoyed px see you at the post ::: 

  Serena kisses

venerdì 16 maggio 2014

Piccoli Folletti ---small Flyers

Eccomi qua ... nuovo post ..  di cosa vi parlo... mah si... dai sto scherzando !!!
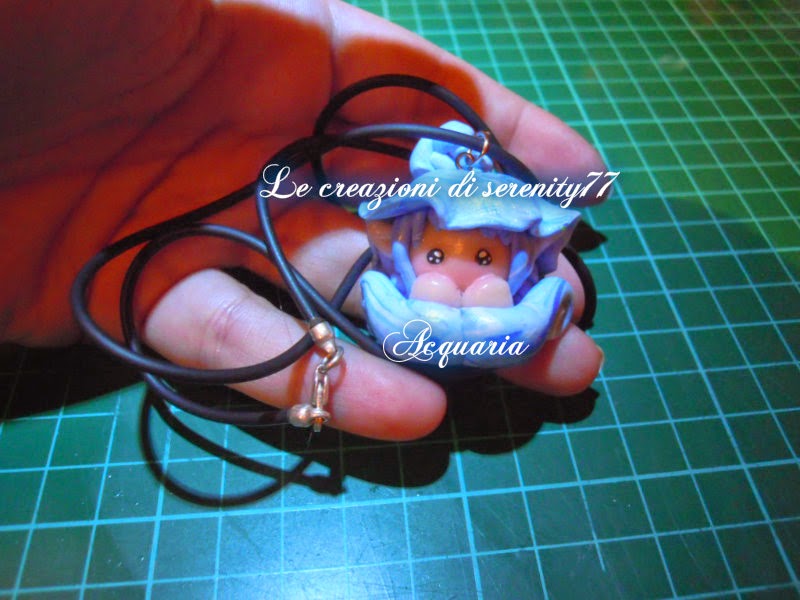
Ecco le mie nuove  piccole opere con paste polimeriche ( Fimo e Cernit )
Le piccole follette !! Sono adorabili , piccole e le potete portare ovunque voi volete , sono stata realizzate per essere portachiavi , delle collane , bomboniere  e tanto altro !!!!
Vi lascio alle foto !!!


Lei è Mimi , la nuova arrivata dai toni verdi e fucsia .....


English

Here I am ... new post .. what I speak ... well ... come on you kidding! 
Here are my new small works with polymer clay (Fimo and Cernit) 
Small follette! They are adorable, small and you can take it anywhere you want, I was made ​​to be key chains, necklaces, wedding favors and much more!! 
I leave you to the photos!

Hug !! Serena 

lunedì 12 maggio 2014

Folletti!!!!!!----New Entry!!!!-------Leprechauns!! ---- New Entry!!

Di nuovo qua !!! E'  con immenso piacere che vi presento le new entry dei folletti ....
Eccoli :la prima si chiama Cucciolina , la seconda si chiama Girabella

Per crearle ho utilizzato due tipi di paste polimeriche : Fimo Soft e Cernit ..


English
Back here! And 'with great pleasure that I present to you the new entry of the elves .... 
Here they are: the first is called cucciolina, the second is called Girabella 

To create them I used two types of polymer clay: Fimo Soft and Cernit ..

Mini Album Vintage------Vintage Mini Album

Eccomi qua... voglio farvi vedere una mia ultima creazione .... un mini album realizzato con cartoncino di riciclo e una busta del pane ....,mi sono ispirata ad un video visto su youtube di una ragazza,llei aveva utilizzato del cartoncino , io invece ho voluto osare ed utilizzare dei materiali diversi .....ho ricoperto il cartoncino di base con carta scrap , dopo di chè ho piegato la busta del pane ed ho attaccato le carte che avevo gia preparato prima prendendo le misure , ho sporcato i bordi con un tampone marrone e la chiusura lo ideata molto semplice ; con un nastrino verde il quale si intonava bene con la carta con cui ho rivestito il cartoncino , una scritta e una piccola girandola  come decorazione fatta da me ,  vi lascio alle foto :)


English


Here I am ... I want to show you my latest creation .... a mini album made with recycled cardboard and a bag of bread ...., I was inspired to have seen a video on youtube of a girl, had used Llei of the card, but I've wanted to be daring and use of different materials ..... I covered the cardboard base with paper scraps, after which I folded the bag of bread and stuck the cards that I had already prepared before taking action , I dirtied the edges with a buffer brown and closing the designed very simple; with a green ribbon which is well matched with the paper with which I covered the cardboard, one written and one small pinwheel as a decoration made ​​by me, I leave you with photos :)